I have fond memories growing up of making Christmas ornaments each year. Our Christmas tree never looked like something out of a magazine, but to me it was beautiful. I love going to my parents house as an adult and seeing all the ornaments my sister and I made growing up.
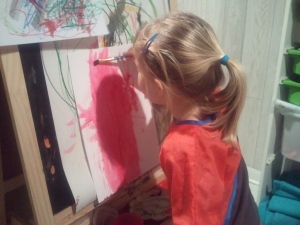
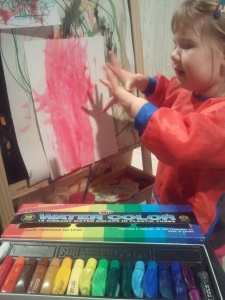
This holiday tradition is one that I am excited to be passing down to my daughter. Last year she was only 22 months, so I just bought some cardboard blank ornaments at Hobby Lobby and she painted them. This year I wanted to something a little more “crafty”.
Originally I was thinking we would do salt dough ornaments, which I remember making as a child. Then I saw this post for Baking Soda Clay Ornaments and thought we would give it a try. 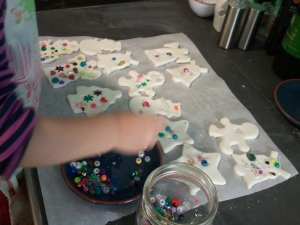 This recipe for making clay with baking soda, corn starch and water was completely new to me. I have made homemade play dough many times (I hope to someday share my mom’s recipe that she used when we were growing up and in her preschool). I really like the consistency and the pure white color of this clay.
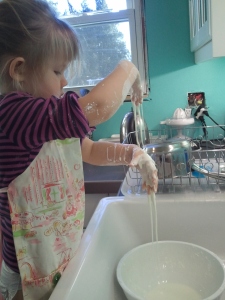
We pretty much followed the way Play at Home Mom did her ornaments. We didn’t add any color to the dough though, which I think helps to make the shiny beads really stand out. I’m not comfortable with Maggie using the stove, so made her some GOOP (just cornstarch & water) to play with while I cooked the dough. She loved it, as you can see.
 After the dough cooled, I rolled out the dough. Maggie wasn’t too into the rolling out part, but she did help me choose the cookie cutters and press them into the dough. Once we had all of our shapes I gave her a bowl of beads that I got for $1 at Joann’s and let her loose with decorating them. She loved this part and got really into it. She was very focused on pressing in each bead and spent about an hour working on them.
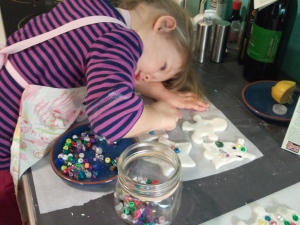 After they were all beaded, I used a toothpick to make a hole in each one. We then left them on the counter top to dry over night. In the morning, I carefully flipped them over with a spatula to let the back dry out as well. A few of the beads fell out when I did this. So after they were dry, I hot glued the beads that fell out back in place. I then put one coat of Modge Podge on the whole thing and let it dry. I still need to put strings in them, but I think I’ll just use some leftover yarn.
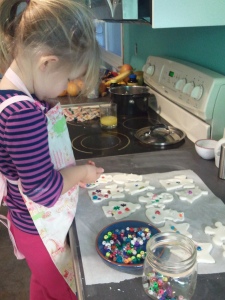 I have a few pointers for those who might want to try this themselves. First, the dough dries out pretty quickly. I should have kept half the dough covered while we worked. Some of the ornaments got a little dried out before Maggie had a chance to press the beads in. Secondly, make sure your dough isn’t too thin when you roll it out. The combination of having some ornaments too thin, and waiting too long to decorate them meant that about half of our ornaments ended up cracking while they dried. I broke up the ones that cracked and took the beads out, so we can use them again on another project.
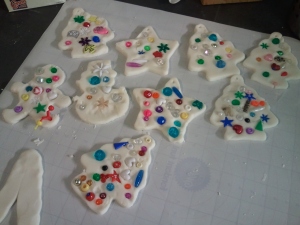
Overall, I’m very pleased with the way these came out. I think they will look great on the tree and Maggie had a blast doing them. I didn’t have any cornstarch or baking soda on hand, but those only cost about $3, so this project was very inexpensive. Since half of ours ended up breaking, I think we will probably end up doing this again sometime before the holidays. If you’re looking for a cheap,easy and attractive way to make ornaments with your kids, I would absolutely recommend this method. We’re looking forward to adding them to our tree!
 In my family (and Kryz’s), we always drained the raw egg out of the shell rather than hard boiling it. Using this method, we are able to keep the eggs from year to year. My parents have eggs that my great grandmother made us when we were young. I wanted to teach my daughter how to do it so that maybe one day she can show these eggs to her children!
 I was amazed at how different the dyes are today than when I was a kid. I bought a $2 standard PAAS kit at the grocery store and used the vinegar method which is what we always did growing up. Maggie loved having so many different choices of color. She loved using the little egg wire that comes with the kit to stir each one. But after less than a minute, she was ready to take them out! I decided to let go of my need to make them look perfect and let her enjoy the process. Her favorite activity was to take one egg and dip it in each color of dye. Her fingers were dyed as much, if not more, than the eggs!
 In the end, letting her take the reigns absolutely paid off. The eggs have a gorgeous marbled effect, and even the ones that were in only a minute came out bright and saturated. Later in the day, Kryz found some ribbons in my sewing area. He and Maggie added the ribbons to a few of the eggs like he remembers doing as a kid. I’m so happy that both of us were able to share some quality time and family traditions with her and that we will have these eggs to cherish for years to come.